
Hello again! Hope you're having a great day :)
As promised, here are some updates of the scarf that I'm currently knitting, you'll find a brief explanation of the pattern I'm using to, so simple, but great results!
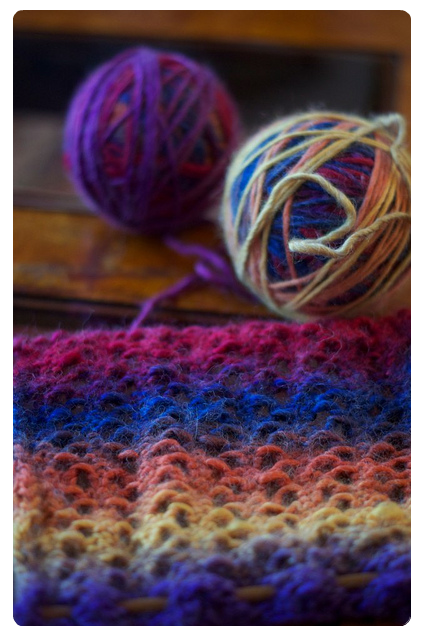

The original pattern recommends using two strands of different wool together, as it calls for 5.5mm needles (us size 9). I however just used a single strand of wool that called for 6mm, you can still see the pattern, but I can imagine it being nicer with the lighter weighted yarn.
The pattern is actually very simple to do, I've been strongly avoiding any kind of pattern where I don't understand the abbreviations! ha! I had actually looked at this pattern before, but ignored it because of that reason, how wrong was I?! If you know how to knit, and how to purl, then you're good to go!
Abbreviations
co: Cast On
rs: Right Side
ws: Wrong Side
k: knit
p: purl
sts: stitches
s1: slip a stitch
k2tog: knit two stitches together, as if they were one
psso: pass slipped stitch over
yo: yarn over
bo: bind off
So, your right (as opposed to wrong, not left) side is the first row that you start to work on, and so this is the odd rows, 1 and 3, etc; the wrong side then being the even rows, 2 and 4, and so on.
You know your knit and purl stitches and a slip stitch is basically starting a knit stitch, but passing it over without wrapping the yarn around your needles.
Yarn over is just moving the working wool around the back of the right needle so that it is in between the needles.
Knitting two stitches together is just as easy, starting with the second one down and working upwards.
After this you'll be passing the slipped stitch over, to do this, just take your left hand needle, lifting the second stitch down (usually found underneath your "yarn over" stitch) from above, and taking it up over the right hand needle (so same one that it was on) so that it then sits like a loop in between the two needles.
- Start by casting on, 28 stitches for this. If you usually use the simple way of CO using one of your fingers and making loops, you need to use the proper way (I know, I know, I work like that too, but it simply does not work for this, due to the slip stitches, etc). Use this video tutorial if you need to know how.
- Row 1(rs): K2, *K3, YO, SL1, K2TOG, PSSO, YO; repeat from * to last 2 sts, K2
- Row 2 (ws): Purl all sts
- Row 3 (rs): K2, *YO, SL1, K2TOG, PSSO, YO, K3; repeat from * to last 2 sts, K2
- Row 4 (ws): Purl all sts
- Repeat rows 1 - 4 until scarf measures about 85" (or as long as you wish, remembering to leave enough for one more row) and BO all stitches.
I hope I've managed to explain this well enough! For any of the types of stitches, like binding off, you can find plenty of great video tutorials on in the internet, so hope that helps.

If you do decide to give this a go, or if you have any questions, leave me a comment below, or send me an email at remlangton@hotmail.com.
Thanks, lovelies!
No comments:
Post a Comment